Here I provide short descriptions a number of hikes in the Sandia Mountains.
| Difficulty | Trails Covered | Miles | Maximum
Elevation Diff. (feet) |
| Moderate | Strip Mine Trail; Trail 246 | 6 | 1,580 |
| Moderate | Three Gun Spring Trail | 5 | 1,580 |
| Moderate | Hawk Watch Trail | 4 | 1,540 |
| Moderate | Del Agua Trail, Piedra Lisa Trail | 8 | 2,200 |
| Moderate | Piedra Lisa Trail, Rincon Spur Trail | 7 | 1,220 |
| Moderate | Ojo del Orno, North Crest Trail | 3.5 | 1,010 |
| Difficult | South Crest, Lower Faulty, Upper Faulty | 5.5 | 1,040 |
| Easy | Armijo Trail | 4 | 700 |
| Difficult | Embudo, Post Pass, Three Gun Spring,
Whitewash Trails |
10 | 2,440 |
| Difficult | Pino Trail | 8 | 2,760 |
| Difficult | Embudito Trail | 11 | 3,540 |
| Difficult | South Crest Trail, CCC Trail | 10 | 2,840 |
| Difficult | Cienega, S. Crest, Tree Spring,
Oso Corredor, Sulphur Canyon Trails |
11 | 2,200 |
| Moderate | North Crest, Penasco Blanco, Osha Loop,
10 K Trails |
9 | 2,150 |
| Difficult | Canoncito, South Crest, Bart’s Trails | 11 | 2,120 |
| Moderate | North 10K Trail, Osha Loop Trail | 9 | 800 |
| Moderate | Crest Spur, South Crest Trail, Kiwanis Cabin | 7 | 1,180 |
| Most
Difficult |
Chimney Canyon Trail, La Luz Trail | 8 | 2,440 |
| Difficult | Osha Spring Trail | 8 | 2,500 |
| Moderate | Tramway Trail | 4.5 | 670 |
| Easiest | Boundary Loop Trail | 4 | 570 |
| Moderate | Agua Sarca Trail, North Crest Trail, Del Orno Trail | 7 | 2,500 |
| Moderate | Fletcher Trail | 5 | 1,040 |
| Difficult | Domingo Baca Trail, TWA Canyon | 7 | 2,280 |
| Moderate | North Mano Route, South Mano Route | 5 | 950 |
Strip Mine Trail and Trail 246
Driving Instructions
To find Strip Mine Trail, take I-25 north from Albuquerque, then the Placitas exit number 242, and go east. After about 3 miles, turn right (south) on a Forest Service dirt road. The parking area for the trail is just about 100 yards off of the road to Placitas (wp STRTH).
Hike Description
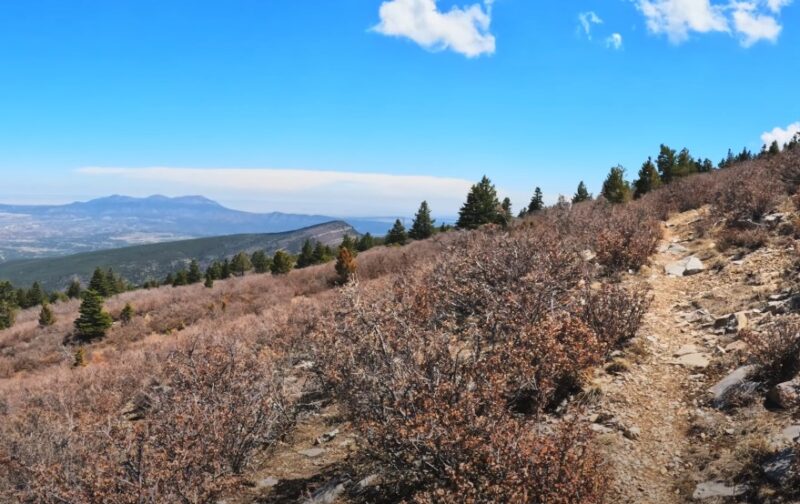
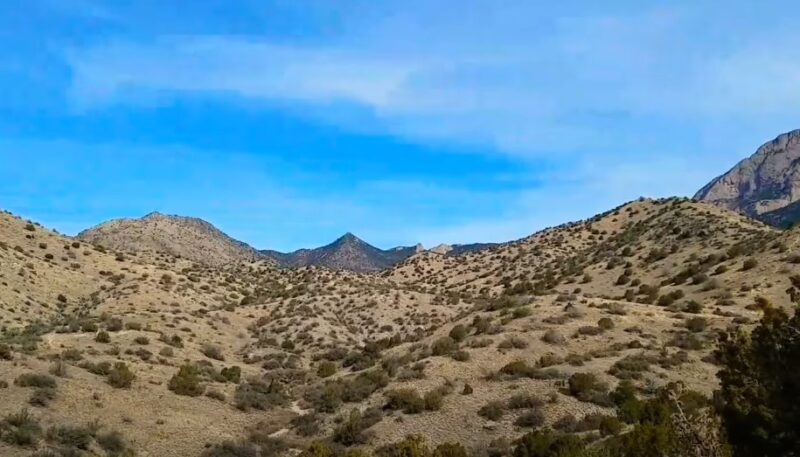
The Strip Mine Trail is a rough and exposed trail in the far north foothills of the Sandias. It follows an old jeep road that takes you past an abandoned strip mine. The trail is rather easy and flat, although sun and lack of trees can make it a very hot hike. I recommend that you hike this trail in a cool time of year or early in the morning.
The trail goes up and down through small gullies, and passes a small exposed strip mine to the north. The exposed earth below the top soil is red along here, and very striking. The route also passes through low scrub brush and cactus, about the only vegetation in the area.
About 1 mile into the hike, you will reach a fork in the trail (wp STR246). Look for a line of small rocks piled on the trail diverting you to the north. The blocked, southern branch is Trail 246. This south option will take you a little higher in elevation, into some greenery. The trail goes back and forth through a fence marking the wilderness boundary a few times along the way. You can follow the trail up toward a small peak (around 7,000 feet elevation). The trail then starts wrapping around to the right (west) of the peak, but seems to peter-out and disappear shortly after this. This spot is a nice place to rest and enjoy a view of the area. Retrace your path back down to join Strip Mine Trail (wp STR246).
If you continue on the main Strip Mine Trail, which is the north branch (from wp STR246), it continues for less than a quarter mile. You will reach another trailhead sign and a dirt road, which is the end of the hike in this direction (wp STREND). Retrace your steps, walking the five minutes back to junction with Trail 246 (wp STR246), then continue west on Strip Mine Trail back to your car.
| Waypoint | Latitude | Longitude | Description |
| STR246 | N 35° 17.725′ | W 106° 27.418′ | Strip Mine Trail- Trail 246 junction |
| STREND | N 35° 17.866′ | W 106° 27.386′ | Strip Mine Trail east end |
| STRTH | N 35° 18.018′ | W 106° 28.837′ | Strip Mine (west) trailhead |
Three Gun Spring Trail

Driving Instructions
To find Three Gun Spring Trail, travel east from Albuquerque on I-40, take the Carnuel exit to Old 66, and drive about 1.5 miles east. There is a brown hiking sign marking the turn-off from Route 66 to the Monticello subdivision, providing access to the trail. On the residential road to the trailhead there are signs marked “522” at each turn. Parking is in a sandy arroyo bottom, marked by signs (wp TGSTH).
Hike Description
This is good hike, with nice view of Tijeras Canyon and I-40 to the south, and Albuquerque across Embudo Canyon to the west. I usually take this hike in the winter; the direct sunshine and lack of shade can make it a tough hike later in the year.
From the parking area, it is about a half mile walk up a sandy area to reach the entry to the National Forest (wp TGSWP1). There is a large Forest Service sign there with a map of all the Sandia trail system. About three-quarters of a mile past the sign, just before the first set of switchbacks at the north end of the canyon, there is a turn-off to Three Gun Spring (wp TGSWP2), if you are interested in a little off-trail exploration.
The switchbacks going up the south-facing wall of the canyon are a good workout.
At the top of the switchbacks you will reach the intersection of Three Gun Spring Trail with Embudo Trail, marked by a sign post (wp EMBTGS). Embudo Trail comes up Embudo Canyon west of this point. Three Gun Spring Trail continues to the north from this junction around the next canyon and terminates at Oso Pass. However, that portion of the trail will probably be snowy and tough hiking most of the winter. You may either continue up to Oso Pass or return to your car from here.
| Waypoint | Latitude | Longitude | Description |
| EMBTGS | N 35° 6.206′ | W 106° 26.556′ | Embudo – Three Gun Spring Trail junction |
| TGSTH | N 35° 4.587′ | W 106° 26.649′ | Three Gun Spring trailhead |
| TGSWP1 | N 35° 4.960′ | W 106° 26.617′ | Three Gun Spring Trail wilderness boundary |
| TGSWP2 | N 35° 5.808′ | W 106° 26.428′ | Three Gun Spring Trail switchbacks |
Hawk Watch Trail
Driving Instructions
The Hawk Watch Trail is an off-shoot of Three Gun Spring Trail, so the driving instructions are the same. Drive east from Albuquerque on I-40, take the Carnuel exit, and go 1.5 miles east on old Route 66. There is a brown hiking sign marking the turn-off from Route 66 to the Monticello subdivision, providing access to the trail. On the residential road to the trailhead there are signs marked “522” at each turn. Park in the dirt lot at the trailhead, marked by signs (wp TGSTH).
Hike Description
Hawk Watch Trail is a very good workout. It is not long, but is a steep climb its entire length. The name of the trail derives from the hawks and other raptors making this area a stopover on their migratory route north in the spring months.
The hike begins along Three Gun Spring Trail, following it about a half mile to the entrance to the wilderness area (wp TGSWP1). Immediately after entering the wilderness, there is a sign for Hawk Watch Trail, which heads to the right (east). Hawk Watch is a steep trail, but quite easy to follow. There are nice views into Three Gun Spring Canyon, and south to I-40 and Tijeras Canyon. After about a mile and a quarter, Hawk Watch Trail reaches a flat ridge (wp HWKWP1). I believe that this is the end of the “official” Hawk Watch Trail; this spot is around 7,400 feet in elevation.
There is a less-distinct, but easy to follow trail continuing up the slope toward the east. This path leads to the area where Hawk Watch International conducts its trapping and banding research on migratory patterns of the raptors in the area. Please don’t go up into that area when they are up there doing their work.
| Waypoint | Latitude | Longitude | Description |
| HWKWP1 | N 35° 5.229′ | W 106° 25.949′ | Hawk Watch plateau |
| TGSTH | N 35° 4.587′ | W 106° 26.649′ | Three Gun Spring trailhead |
| TGSWP1 | N 35° 4.960′ | W 106° 26.617′ | Three Gun Spring Trail wilderness boundary |
Del Agua Trail and Piedra Lisa Trail
Driving Instructions
To reach the trailhead, take I-25 north from Albuquerque, then exit 242 east. Turn south onto FR 445, just past the 3 mile marker. It is about a 10 minute drive on a bumpy dirt road to reach Piedra Lisa Trail’s north trailhead (wp PLSTHN).
Hike Description
This hike takes you up Del Agua Trail, then along the northern portion of Piedra Lisa Trail. It is a nice loop hike, although portions of Del Agua Trail (in the canyon bottom) are often overgrown. As such, this hike is a bit more rugged than most.
The trailhead for Del Agua Trail was relocated in September, 2008. Del Agua Trail and (the northern portion of) Piedra Lisa Trail now both begin at the same place (wp PLSTHN).
To begin the hike, head south (actually it is southwest) from the grey signpost marking the Piedra Lisa Trail. Note: from this spot, Piedra Lisa Trail heads southeast up a sandy arroyo. You want to take the trail heading off to your right, toward the nearby foothills.
Del Agua Trail gains a bit of elevation as you head along the foothills toward Del Agua Canyon. Upon reaching the canyon, the trail turns eastward and then drops into the canyon bottom along a streambed (wp DAGWP1). It continues along the streambed the remainder of its length. The trail is overgrown and a little hard to discern at some places along the way. There are a couple of spots where the trail splits into a canyon going to the left and one going to the right. In each case (wp DAGWP2 and DAGWP3), take the left branch.
I usually cointinue my hike on Piedra Lisa Trail to the south (right). This is a very scenic and pleasant hike along a well-worn trail. It is about a mile from this point to the half-way mark of Piedra Lisa Trail, where the trail drops into a canyon bottom. In this low area, there is a sign post marking the half-way point of Piedra Lisa Trail (wp PLSWP2). From this spot, it is 2.5 miles south to the far end of Piedra Lisa Trail, and 2.5 miles back to the northern trailhead.
You can continue hiking south on Piedra Lisa Trail for about another half mile to reach the ridge of the Rincon (wp PLSWP1). There are a couple of gray signpoles marking the route over the ridge connecting the northern and southern portions of Piedra Lisa Trail. This is the highest point of Piedra Lisa Trail, and is a nice place for lunch.
At this point, turn around to hike back north to your car. Hike down the steep slope from the Rincon and through the canyon bottom (wp PLSWP2). After another mile, you will pass the junction with Del Agua Canyon (wp DAGPLS). Continue on Piedra Lisa Trail to the parking area. The last 1-3/4 miles are rather steep, with barren hillsides and little shade. There are plenty of loose rocks on the steep trail, so be careful of your footing.
| Waypoint | Latitude | Longitude | Description |
| DAGPLS | N 35° 15.755′ | W 106° 28.079′ | Del Agua – Piedra Lisa Trail junction |
| DAGWP1 | N 35° 16.232′ | W 106° 28.992′ | Del Agua waypoint 1 |
| DAGWP2 | N 35° 16.094′ | W 106° 28.791′ | Del Agua waypoint 2 |
| DAGWP3 | N 35° 15.835′ | W 106° 28.303′ | Del Agua waypoint 3 |
| PLSTHN | N 35° 16.734′ | W 106° 28.711′ | Piedra Lisa (north) trailhead |
| PLSWP1 | N 35° 14.676′ | W 106° 28.510′ | Piedra Lisa Trail crosses the Rincon |
| PLSWP2 | N 35° 15.193′ | W 106° 28.371′ | Piedra Lisa waypoint 2 |
Piedra Lisa Trail and Rincon Spur Trail
Driving Instructions
To find the trailhead for the southern portion of Piedra Lisa Trail, take Tramway Boulevard north; about a mile north of the turn-off to the Tram, turn east on FR 333. After about 2 miles, where FR 333 takes a hard right through a stone gate, continue straight ahead on FR 333D, which becomes a dirt road. It is a very short distance along a narrow, bumpy dirt road to the trailhead parking lot (wp PLSTHS).
Hike Description
From the parking lot walk north about a quarter of a mile on the dirt road to reach a turn-off to Piedra Lisa Trail (wp PLSWP4). The trail goes up a short slope, then drops down into a canyon bottom after a short distance. At the bottom of this canyon (wp FLETH) is the intersection of Piedra Lisa Trail with Fletcher Trail, Waterfall Canyon, and Movie Trail, which are all off to the right (east).That area, east of Piedra Lisa Trail, is officially closed to the public between March 1 and August 15 every year, to protect wildlife. For this hike, continue along Piedra Lisa Trail.
The hike up Piedra Lisa Trail is very pretty. There are nice views of the green canyons on both sides of the trail, as it travels up the ridge line. To the east of the ridge is Upper Juan Tabo Canyon, and to the west is the broad Lower Juan Tabo Canyon. Piedra Lisa Trail gets a little steep shortly before reaching the top of the ridge line that runs east-west. Two sign poles marke the top of the ridge (wp PLSWP1), pointing the way for the continuation of Piedra Lisa Trail to the north, which I described on the hike discussed above. This ridge is called the Rincon (Spanish for “corner”). A seldom-traveled path, Rincon Spur Trail, bisects Piedra Lisa Trail at this point and runs along the ridge. Please refer to my “Sandia Mountain Hiking Guide” for more information about this trail.
After exploring this area, you can return by hiking south on Piedra Lisa Trail to your car.
| Waypoint | Latitude | Longitude | Description |
| FLETH | N 35° 13.851′ | W 106° 28.774′ | Fletcher trailhead |
| PLSTHS | N 35° 13.378′ | W 106° 29.005′ | Piedra Lisa (south) trailhead |
| PLSWP1 | N 35° 14.676′ | W 106° 28.510′ | Piedra Lisa Trail crosses the Rincon |
| PLSWP4 | N 35° 13.698′ | W 106° 28.938′ | Piedra Lisa waypoint 4 |
Ojo del Orno Canyon and North Crest Trail
Driving Instructions
To find the Tunnel Spring trailhead, go north on I-25 from Albuquerque, take the Placitas exit 242 and go east. The turn-off for the trail is FR 231, about 50 yards before the 5-mile marker. There is a green street sign that says Tunnel Spring (the name of the road), and a group of mailboxes. Follow the dirt road to the trailhead. Park at the Tunnel Spring parking lot (wp NCRTH).
Hike Description
Ojo del Orno Trail is a shorter route to get to the upper regions of the north end of the mountain. To find Ojo del Orno Trail, begin hiking from the Tunnel Spring trailhead (wp NCRTH). The trail turn-off to Ojo del Orno is just ten feet east of the Forest Service sign that says “Sandia Mountain Wilderness” (wp DORTH) about 100 yards from the start of the North Crest Trail.
A few feet before the streambed, the Ojo del Orno Trail heads off to the right (south). It is easy to follow the trail all the way up to its upper junction with the North Crest Trail. Ojo del Orno Trail is very steep and rugged, but is a nice workout. I have provided one intermediate GPS waypoint along the route (wp DORWP1). It is about a 0.8 mile hike up the canyon to reach the intersection with North Crest Trail (wp DORNCR).
To complete this loop hike, go east on the CrestTrail instead of going back down Ojo del Orno. The Crest Trail loops to the east, then curves back to the west to the parking area. The Crest Trail has a somewhat uphill grade for the last mile or so, which adds a bit of an extra workout at the end of the hike.
| Waypoint | Latitude | Longitude | Description |
| DORNCR | N 35° 16.890′ | W 106° 26.097′ | Del Orno Trail – North Crest Trail upper junction |
| DORTH | N 35° 17.451′ | W 106° 26.323′ | Del Orno Trail lower trailhead |
| DORWP1 | N 35° 17.068′ | W 106° 26.154′ | Del Orno waypoint 1 |
| NCRTH | N 35° 17.487′ | W 106° 26.372′ | North Crest trailhead (Tunnel Spring) |
South Crest, Faulty, Upper Faulty Trails

Driving Instructions
To find the South Crest Trail, take I-40 east from Albuquerque, then take the south Tijeras exit from I-40. Turn left at the first stop sign, and go under the freeway. The access road deadends here in a “T.” Turn right to go to the Canyon Estates housing area. (If you turn left at the deadend, it would take you onto I-40 westbound.) Follow the signs to the trailhead parking lot (wp SCRSPK).
Hike Description
To begin this hike, follow the South Crest Trail for about three quarters of a mile to reach the junction with Lower Faulty Trail, which is marked by a sign (wp SCRLFL). Take the turn-off and begin hiking north on Faulty Trail. The first part of Faulty Trail is rather steep, but the hardest part is over in a few minutes. The walk along Faulty is beautiful and serene. It is one of my favorite trails in the lower part of the mountain.
The entire length of Faulty Trail is easy to follow with diamond blazes marked into tree trunks along the way. (On Upper Faulty Trail, the trees are similarly marked, but with squares, instead of diamonds.) After about a mile on Lower Faulty Trail, you will reach the intersection with Upper Faulty Trail, marked by a sign (wp UFLLFL).
| Waypoint | Latitude | Longitude | Description |
| SCRLFL | N 35° 5.849′ | W 106° 23.832′ | South Crest – Lower Faulty Trail junction |
| SCRSPK | N 35° 5.373′ | W 106° 23.494′ | South Crest parking |
| SCRUFL | N 35° 5.916′ | W 106° 24.360′ | South Crest – Upper Faulty Trail junction |
| UFLLFL | N 35° 6.717′ | W 106° 23.876′ | Upper Faulty – Lower Faulty Trail junction |
Armijo Trail
Driving Instructions
For this hike, take I-40 east from Albuquerque, then go north on NM 14 for 6 miles, and take the turn-off to the Crest Highway (NM 536). Drive 1.7 miles to the Sulphur Canyon Picnic Ground entrance. Make an immediate left turn on the asphalt road going uphill; after one half mile, the road makes a T at a parking area, where you may leave your car (wp ARMPRK).
Hike Description
From the parking area walk east along an abandonded asphalt road until the dead-end of the pavement (wp ARMWP1). Continue down the dirt path for a hundred yards or so toward a fence (beyond which is private property). Just before the fence is the beginning of Armijo Trail. There is a sign post pointing the way to a distinct trail going over a small ridge to your right (west). At the top of the ridge (only about 20 feet up), you will see a well-worn trail leading down into the valley, and off to the west. Armijo Trail is one of the most pleasant trails in the mountain, traveling through lush trees and grassy areas, making its way up to Faulty Trail.
Armijo Trail is easy to follow, with only a very slight uphill grade. The trail meanders uphill, in many places runing parallel to a small stream. Follow Armijo Trail to its intersection with Faulty Trail (wp ARMFLT), marked by a sign.
Continue your hike by heading north on Faulty Trail. After a mile or so you will reach a high overlook above Cienega Canyon (wp FLTWP2). Faulty Trail then heads down into the canyon below to the intersection with Cienega Trail (wp CIEFLT), marked by a sign.
| Waypoint | Latitude | Longitude | Description |
| ARMFLT | N 35° 9.381′ | W 106° 23.336′ | Armijo – Faulty Trail junction |
| ARMWP1 | N 35° 9.862′ | W 106° 22.099′ | Armijo Trail waypoint 1 |
| ARMPRK | N 35° 9.902′ | W 106° 22.561′ | Armijo Trail parking |
| CIEFLT | N 35° 10.082′ | W 106° 23.368′ | Cienega – Faulty Trail junction |
| FLTWP2 | N 35° 10.095′ | W 106° 23.256′ | Faulty Trail waypoint 2 |
Embudo, Post Pass, Three Gun Spring, Whitewash Trails
Driving Instructions
To find the parking lot to start this hike, go east on Menaul until it ends at a parking area for the Albuquerque Open Space (wp MENLPK).
Hike Description
Begin hiking on a rough trail south from your car (wp MENLPK). Follow the power line toward the east for a ways, then head south to the parking lot at the end of Indian School Road (wp INSCPK). Embudo Trail begins from this parking lot and heads east. Embudo Trail enters the Wilderness boundary at the intersection with the Foothills Trail 365 (wp EMB365). The sandy Embudo Trail continues east to the mouth of the tight canyon (wp EMBWP1).
Embudo Trail is a little rough and overgrown through this narrow canyon. As you hike through the canyon, you never need to go to the right (south) side of the stream. If you always keep looking up and to your left as you make your way through the canyon, a trail will be there.
As you exit the canyon, the trail jogs to the right (south). Follow the well-worn trail up and down an arroyo or two into the broad expanse of Embudo Canyon. The hike up Embudo Trail becomes very pleasant as it makes its way east to the far end of Embudo Canyon. It is about a mile hike through the generally flat canyon bottom. The trail then begins a series of switchbacks (wp EMBWP4) that takes you to the upper portion of the canyon. At the top of the switchbacks, you will come upon a saddle point, which is the turn-off (wp EMBPOS) to a faint user-trail to Post Pass to the south. The trail to Post Pass is blocked with a line of small rocks to keep the casual hiker from making the wrong turn.
If you decide to hike south to Post Pass, the trail is a little indistinct, but basically follows the ridge line. It is not easy to tell when you arrive precisely at the pass itself (wp POSTPS). There are nice views of Three Gun Spring Canyon on the east, Embudo Canyon on the west, and I-40 to the south from this flat area. From Post Pass make your way back north to Embudo Trail (wp EMBPOS). It is about another one third of a mile farther along Embudo Trail to reach the intersection with Three Gun Spring Trail (wp EMBTGS). This is a steep portion of the trail, so be prepared for a little workout here. Embudo Trail ends at this point.
The next portion of the hike continues north along Three Gun Spring Trail toward Oso Pass (wp OSOPSS), which is about a mile and a half hike.The last few minutes before reaching Oso Pass are a little steep and slick.
Oso Pass is a significant spot at the southern part of the Sandia Mountains, with trails converging from four different directions. Embudito Trail comes up to Oso Pass from the north; it continues east from this point, heading up to Deer Pass and South Peak. Three Gun Spring arrives at Oso Pass from the south, the direction you have just come from. Finally, Whitewash Trail heads west from Oso Pass. Whitewash Trail is not part of the official maintained set of Forest Service trails, but is fairly well-traveled. You finish this loop hike down the mountain on Whitewash Trail.
Whitewash Trail is well-worn and easy to follow for most of its distance. About a mile into Whitewash Trail (wp WHWWP1), there is a deep canyon (Long Canyon) and dried up streambed far below and to your right (north). As soon as you come out of this final canyon, the correct path for Whitewash Trail takes a sharp left turn (wp WHWWP2). There is clearly another trail in front of you, heading straight west. However, you don’t want to take this fork! It would lead you down a long ridge going to the northwest, and exiting the mountain around Montgomery Blvd. You have to know to look for Whitewash Trail immediately to your left, or it is easy to make that mistake. (As you might guess, I speak from experience here.)
After only a short distance walking toward the south, the trail seems to go up to an “outpost” mound, perhaps 30 feet high (wp WHWWP3). It is easy to lose sight of the trail right after this point. When you get to the top of this outpost, continue going south down to the bottom of the hill (only 30 yards, or so). When the ground gets flat, look immediately to your right (west), and you will see a well-worn path, which is Whitewash Trail.
The trail down Whitewash Trail from here becomes quite steep. The going is very slow, and you have to be careful picking your way down the western face of the mountain. In places it is hard to find the “main trail,” because the area is criss-crossed with dozens of other user trails along the way. For the most part it doesn’t matter if you take a slight variant coming down. I just kept working your way to the southwest toward the parking area at the end of Menaul (wp MENLPK), which comes into view.
| Waypoint | Latitude | Longitude | Description |
| EMB365 | N 35° 5.944′ | W 106° 28.298′ | Embudo – Trail 365 junction |
| EMBPOS | N 35° 5.990′ | W 106° 26.735′ | Embudo-Post Pass Trail junction |
| EMBTGS | N 35° 6.206′ | W 106° 26.556′ | Embudo – Three Gun Spring Trail junction |
| EMBWP1 | N 35° 5.800′ | W 106° 27.879′ | Embudo Trail waypoint 1 |
| EMBWP2 | N 35° 5.772′ | W 106° 27.572′ | Embudo Trail waypoint 2 |
| EMBWP3 | N 35° 5.761′ | W 106° 27.556′ | Embudo Trail waypoint 3 |
| EMBWP4 | N 35° 6.090′ | W 106° 26.879′ | Embudo Trail waypoint 4 |
| INSCPK | N 35° 5.943′ | W 106° 28.800′ | Parking lot at end of Indian School |
| MENLPK | N 35° 6.301′ | W 106° 29.300′ | Menaul parking |
| OSOPSS | N 35° 7.065′ | W 106° 26.596′ | Oso Pass |
| POSTPS | N 35° 5.744′ | W 106° 26.819′ | Post Pass (approximate location) |
| WHWWP1 | N 35° 7.019′ | W 106° 27.924′ | Whitewash Trail waypoint 1 |
| WHWWP2 | N 35° 6.980′ | W 106° 28.067′ | Whitewash Trail waypoint 2 |
| WHWWP3 | N 35° 6.836′ | W 106° 28.109′ | Whitewash Trail waypoint 3 |
Pino Trail
View this post on Instagram
Driving Instructions
To find the trail, take Tramway Blvd. north from Academy. Turn east on the road leading to the Elena Gallegos Open Space. There is a fee to park that you must pay at the guard station.
Hike Description
Pino Trail is a beautiful hike right at the edge of the city, and is one of the most popular trails in the Sandias. There are several signs from the parking area (wp EGPK) directing the way to the Pino Trailhead. About a mile from the parking lot, the trail enters the Wilderness Area (wp PNOWP1). Pino Trail goes east, up the southern side of Pino Canyon. It travels up to the ridgeline running between Sandia Crest and South Peak. It is a beautiful hike and a very nice workout.
The lower portion of the trail is dry and rocky. However, after couple of miles the trail gets into very nice tree-covered scenery. Eventually there are beautiful views of the rocky western face of the Sandias to the north, in the area near the Tram. The last mile or so of Pino Trail before reaching the junction with the Crest Trail (wp PNOSCR) is the steepest portion of the hike.
| Waypoint | Latitude | Longitude | Description |
| EGPK | N 35° 9.704′ | W 106° 28.191′ | Ellena Gallegos parking lot |
| PNOSCR | N 35° 10.144′ | W 106° 24.850′ | Pino Trail – South Crest Trail junction |
| PNOWP1 | N 35° 9.907′ | W 106° 27.415′ | Pino Trail crosses Forest Service boundary |
Embudito Trail
Driving Instructions
Take Montgomery Blvd. east from Tramway to Glenwood Hills Dr., and turn left. Follow Glenwood Hills north, and you will see a sign pointing to Embudito Trail. The street that you turn east on is named Trailhead, which leads you to the large parking area.
Hike Description
Follow the trail east from the parking lot (wp EBTOTH), and shortly there is a sign saying that Embudito Trail had been rerouted north of the sandy arroyo streambed. The trail heads north and scales the south-facing wall of the canyon. The trail basically follows this face around toward the east, and eventually ends-up in a narrow canyon, one or two hundred feet above the stream. This first portion of Embudito Trail is rocky, exposed, and pretty steep. There are a lot of switchbacks along the way, and it can be very hot, with no shade to speak of.
About a mile into the hike, the trail takes a dip down to the streambed (wp EBTWP1). However, after only 50 yards there is a gray signpost (wp EBTWP2) pointing the way for Embudito Trail to the left and back out of the streambed.
After about another mile or so, Embudito Trail starts getting into some evergreen trees and shade, and it is much more pleasant. The trail crosses a streambed and switches to the north-facing wall of the canyon. This stretch of the trail is very lush and green. It is one of the most secluded and prettiest areas in the Sandia Mountains.
It is about four miles total distance to Oso Pass (wp OSOPSS). From Oso Pass continue up Embudito Trail (heading east now) toward South Peak. This part of the trail is can seem steep and relentless, with poor footing in places.
You will reach a turn-off to South Peak from Embudito Trail (wp EBTWP4) about a mile past Oso Pass. You have to look carefully to your left as you hike along to notice a small trail leading up hill to the left (north). There is often a cairn marking the spot. Take this turn and head uphill. The trail over to South Peak is a little less than a mile from this point. The unmaintained trail is very steep for the first five minutes or so, and also becomes very steep about five minutes before the peak. The last 30 yards before reaching South Peak require a bit of rock scaling.
| Waypoint | Latitude | Longitude | Description |
| EBTOTH | N 35° 8.182′ | W 106° 28.910′ | Embudito Trailhead |
| EBTWP1 | N 35° 8.031′ | W 106° 28.030′ | Embudito Trail waypoint 1 |
| EBTWP2 | N 35° 8.029′ | W 106° 28.000′ | Embudito Trail waypoint 2 |
| EBTWP3 | N 35° 8.028′ | W 106° 27.477′ | Embudito Trail waypoint 3 |
| EBTWP4 | N 35° 6.799′ | W 106° 25.830′ | Embudito Trail waypoint 4 |
| EBTWP5 | N 35° 7.234′ | W 106° 25.856′ | Embudito Trail waypoint 5 |
| OSOPSS | N 35° 7.065′ | W 106° 26.596′ | Oso Pass |
| SCREBT | N 35° 6.666′ | W 106° 25.627′ | South Crest – Embudito Trail junction |
| STHPK | N 35° 7.235′ | W 106° 25.842′ | South Peak |
South Crest Trail and CCC Trail
Driving Instructions
Take I-40 east from Albuquerque, and take the south Tijeras exit. At the stop sign, turn left (north) and go under the freeway. Turn right at the deadend (a left turn would take you up to west-bound I-40). Follow the main residential street to the trail parking area (wp SCRSPK) for the South Crest Trail
Hike Description
The South Crest Trail runs some 16 miles from the Canyon Estates residential area to Sandia Crest. This is a loop hike (well, at least the top portion is a loop).
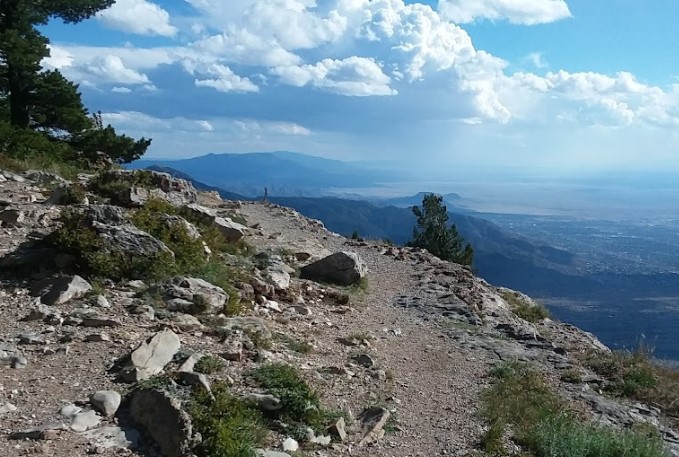
From the Canyon Estates trailhead, begin your hike going up the South Crest Trail. The lower portion of the South Crest Trail is well shaded, easy to follow, with a very modest slope. The scenery, views, and tree cover along the way are beautiful. Along the way up, you pass by the intersections of South Crest Trail with Lower Faulty Trail, (wp SCRLFL) and later the intersection with Upper Faulty Trail (wp SCRUFL). The lower terminus of CCC Trail (wp CCCUFL) is just a few yards north of the point where Upper Faulty Trail meets the South Crest Trail. However, I usually continue hiking up the South Crest Trail and make the descent for the hike on CCC.
Continuing the climb on the South Crest Trail you will eventually reach the ridge line (wp SCRRDG), which opens up to panoramic views of Albuquerque to the west and broad sloping expanses to the east. A bit later the trail passes by South Sandia Spring (wp SCRSPR), which is just below the path by about ten feet. You will probably hear the running water of the spring before noticing the turn-off to it. Water flows out of a 4-inch pipe at the spring and drops into a metal trough, then spills downhill. It is a nice spot to soak your hat to cool off, before resuming the steady climb. Continue on the South Crest Trail to the junction Embudito Trail marked by a sign (wp SCREBT).
The next trick is to find the upper trailhead for CCC Trail. It is not marked by a sign, because CCC is not an officially maintained trail. From the Embudito signpost, continue north on the Crest Trail for just another minute or so, and look for faintly worn path heading over a small embankment toward the east. This is the upper trailhead for CCC Trail (wp SCRCCC).
CCC Trail is quite steep, with poor footing in places. Pay close attention to the path and keep your eye out for cairns marking the way to keep from losing the trail as you go down. The first half of CCC Trail (from the top) is rather exposed to the sun. Eventually, you will gett into some tall trees, and the hiking becomes very pleasant. After about 2 miles you will reach the bottom of CCC Trail (wp CCCUFL), marked by a very large pile of rocks. This lower thrailhead of CCC Trail is just thirty yards north of the intersection of South Crest Trail with Upper Faulty Trail.
For the final leg of this hike, continue down the South Crest Trail to your car.
| Waypoint | Latitude | Longitude | Description |
| CCCUFL | N 35° 5.935′ | W 106° 24.350′ | CCC Trail – Upper Faulty Trail junction |
| SCRCCC | N 35° 6.711′ | W 106° 25.612′ | South Crest Trail – CCC Trail junction |
| SCREBT | N 35° 6.666′ | W 106° 25.627′ | South Crest – Embudito Trail junction |
| SCRLFL | N 35° 5.849′ | W 106° 23.832′ | South Crest – Lower Faulty Trail junction |
| SCRRDG | N 35° 5.687′ | W 106° 25.694′ | South Crest Trail ridge line |
| SCRSPK | N 35° 5.373′ | W 106° 23.494′ | South Crest parking |
| SCRSPR | N 35° 5.965′ | W 106° 25.545′ | South Crest Trail – South Sandia Spring |
| SCRUFL | N 35° 5.916′ | W 106° 24.360′ | South Crest – Upper Faulty Trail junction |
Cienega, South Crest, Tree Spring, Oso Corredor, Faulty, Sulphur Canyon Trails

Driving Instructions
For this hike, take I-40 east from Albuquerque, go north on NM 14 for about 6 miles, and take the turn-off to the Crest Highway, NM 536. Drive 1.7 miles to the Sulphur Spring Picnic Ground turn-off and park there (wp SULPK).
Hike Description
This is a long (9 mile) hike through beautiful, cool and shaded portions of the east side of the Sandias. The hike starts at the Sulphur Spring Picnic Ground parking lot (wp SULPK). (You could also drive to the Cienega Spring trailhead to begin, but I usually chose to leave my car at the Sulphur Spring lot just off of the Crest Highway).
From the Sulphur Spring parking area walk south on the asphalt road for about a half mile.The road makes a “T”, where you should turn right (west) and continue to follow the pavement to the start of Cienega Trail.
To find the Cienega Trailhead (wp CIETH), walk to the very end of the paved road heading west. Take one of the paved trails from the end of the road, up the slope and a little to the left (south). You will see a large Forest Service trail map, marking the start of the Cienega Trail proper.
Hiking up Cienega Trail, after just a few minutes you will pass the intersection with Faulty Trail (wp CIEFLT). Continue up the mountain on Cienega Trail. This section of the trail is beautiful with grass, streams, and high trees. The trail is a steady climb straight uphill, going along a streambed most of the way. Cienega Trail terminates at the ridge, intersecting with South Crest Trail (wp CIESCR). Pino Trail, coming up from the west side, also terminates here at the ridge.
Continue your hike by proceeding north along the South Crest Trail, toward the intersection with Tree Spring Trail, which is about a mile and a half hike. The junction with Tree Spring Trail is marked by signs pointing out trails in several directions.
Head down Tree Spring Trail, one of the most heavily traveled trails in the Sandias. Tree Spring Trail intersects Oso Corredor (wp OSOTSP) shortly before the Tree Spring’s lower trailhead; there is a good sign marking both trails at the intersection. To begin closing the loop hike, proceed south on Oso Corredor Trail. Oso Corredor is a very pretty trail, with a gentle, downhill grade. Follow Oso Corredor its 2.75 mile length to the intersection with Faulty Trail (wp FLTOSO), which is marked by a sign.
Continue south on Faulty Trail for a little over a mile to the intersection with Sulphur Spring Trail (wp FLTSUL). Take Sulphur Spring Trail, which terminates at the far end of the paved picnic ground road. Continue through the paved picnic area to your parked car (wp SULPK).
| Waypoint | Latitude | Longitude | Description |
| 10KTSP | N 35° 11.236′ | W 106° 25.256′ | South 10K – Tree Spring Trail junction |
| CIEFLT | N 35° 10.082′ | W 106° 23.368′ | Cienega – Faulty Trail junction |
| CIESCR | N 35° 10.136′ | W 106° 24.854′ | Cienega – South Crest Trail junction |
| CIETH | N 35° 10.178′ | W 106° 23.047′ | Cienega trailhead |
| FLTOSO | N 35° 10.863′ | W 106° 23.276′ | Faulty – Oso Corredor Trail junction |
| FLTSUL | N 35° 10.371′ | W 106° 23.222′ | Faulty – Sulphur Spring Trail junction |
| OSOTSP | N 35° 11.524′ | W 106° 24.501′ | Oso Corredor – Tree Spring Trail junction |
| SULPK | N 35° 10.339′ | W 106° 22.587′ | Sulphur Spring parking lot |
| TSPTH | N 35° 11.632′ | W 106° 24.287′ | Tree Spring trailhead |
North Crest, Penasco Blanco, Osha Loop, and North 10 K Trails
Driving Instructions
Take I-40 east from Albuquerque, go north on NM 14, then take the Crest Highway (NM 536) all the way to the top of the mountain (13.4 miles), and park in the main lot (wp CRSTPK).
Hike Description
This hike takes you to a beautiful, tree covered area of the mountain north of Sandia Crest. A number of trails cross the area, providing any number of combinations of loop hikes.
The North Crest Trail starts just north of the parking lot (wp CRSTPK). The trail begins by skirting just east of the fence that encloses the radio towers at the top of the Crest.
After a half mile, you will pass a small sign (wp CHMTH) on the east side of the trail that says “Del Agua Overlook 1.5 miles.” Continue north on the Crest Trail for a little over a mile to reach Del Agua Overlook, marked by a gray signpost for the junction of the Crest Trail with North 10 K Trail (wp 10KNCR). In mid- to late September this Overlook is the site of a spectacular show of Fall colors, when the aspens on the north face of the slope turn a beautiful gold.
Hiking north on the Crest Trail another couple of hundred yards, you will pass another gray signpost marking the intersection with Osha Loop Trail (wp NCROLP). Continue hiking north on the Crest Trail for another 3 miles.
The scenery along the walk to Penasco Blanco Trail is spectacular, with very broad views of the green slopes to the east, and down to Las Huertas Canyon. You can survey many square miles, and have the feeling that nobody else is in the entire area (which probably is the case). Along the way, you will pass another stone bench at the top of a switchback (wp AGSNCR). Agua Sarca Trail comes up from the north along the ridgeline and intersects the Crest Trail at this point. From the switchback, the Crest Trail heads downhill and crosses a streambed (wp NCRSTR) at the top of Agua Sarca Canyon. Continue along the Crest Trail until you arrive at the trailhead for Penasco Blanco Trail (wp NCRPBL), marked by a gray signpost, about a half mile past the switchback and stone bench.
Begin hiking south from the Crest Trail along Penasco Blanco Trail. After about a mile and a quarter, you will pass a gray signpost marked “Penasco Blanco” (wp PBLWP1). Just a few dozen yards later is another gray signpost (wp PBLWP2). These posts are meant to mark the route along the trail (instead of marking the intersection with some other trail as is usually the case), in a somewhat confusing area near Osha Spring. The trail passes through an open area, with hardly any tree cover. There are large sections of soft, gray dirt, similar to ashes. Penasco Blanco Trail can be very hard to discern along this stretch. The trail goes pretty much in a straight-line path following the line formed by the signposts just mentioned. If you follow the line formed by the posts, you should be able to pick-up the Penasco Blanco Trail as it re-enters the woods (wp PBLWP3). Without these signposts as way-markers, one could wander around for a long time trying to find the route.
Shortly after continuing on the well-worn trail into the wooded area, you will reach the intersection with Osha Spring Trail (wp OSPPBL) and the south terminus of Penasco Blanco Trail. Continue hiking south on Osha Spring Trail. After only 5 more minutes you will arrive at signpost marking Osha Loop Trail, heading to your left and to your right. Take the left branch of Osha Loop Trail and continue your hike to the south. After about a mile on Osha Loop Trail, you will reach the junction with the North 10 K Trail (wp 10KOLP), marked by a signpost.
From here, take 10 K trail toward the right (west). 10 K Trail crosses Ellis Trail (wp ELI10K), marked by a signpost after about a quarter of a mile. Continuing on 10 K Trail, you will pass the juntion with Survey Trail (wp SRV10K), marked by a signpost, just a quarter of a mile later. (Survey Trail is a cross-country ski trail cutting through this area.) Continue on 10 K Trail, to reach the intersection with the Crest Trail (wp 10KNCR) just a few minutes later. Finish the hike by heading south on the Crest Trail to your car.
| Waypoint | Latitude | Longitude | Description |
| 10KNCR | N 35° 14.257′ | W 106° 26.973′ | North 10K – North Crest Trail junction |
| 10KOLP | N 35° 13.932′ | W 106° 26.631′ | North 10K – Osha Loop Trail junction |
| AGSNCR | N 35° 15.771′ | W 106° 27.025′ | Agua Sarca – North Crest Trail junction |
| CHMTH | N 35° 13.089′ | W 106° 27.085′ | Chimney Canyon trailhead |
| CRSTPK | N 35° 12.679′ | W 106° 26.958′ | Crest parking lot |
| ELI10K | N 35° 14.057′ | W 106° 26.852′ | Ellis – North 10 K Trail junction |
| NCROLP | N 35° 14.472′ | W 106° 27.032′ | North Crest Trail – Osha Loop Trail junction |
| NCRPBL | N 35° 15.759′ | W 106° 26.460′ | North Crest Trail – Penasco Blanco Trail junction |
| NCRSTR | N 35° 15.636′ | W 106° 26.919′ | North Crest Trail crosses stream |
| OSPPBL | N 35° 14.664′ | W 106° 26.129′ | Osha Loop Trail – Penasco Blanco Trail junction |
| PBLWP1 | N 35° 14.815′ | W 106° 26.191′ | Penasco Blanco waypoint 1 |
| PBLWP2 | N 35° 14.779′ | W 106° 26.187′ | Penasco Blanco waypoint 2 |
| PBLWP3 | N 35° 14.732′ | W 106° 26.203′ | Penasco Blanco waypoint 3 |
| SRV10K | N 35° 14.140′ | W 106° 26.948′ | Survey – 10K Trail junction |
Canoncito Trail, South Crest Trail, and Bart’s Trail
Driving Instructions
The turn-off to Canoncito trailhead is 3.4 miles north of I-40 on NM 14. Turn west on Canoncito street from NM 14. The pavement ends at a fork in the road, and you want to take the left at the fork.
In the Spring of 2001, the dirt road for vehicle access to the trailhead was closed by private landowners in the area. Shortly beyond the fork in the road mentioned above, there is a locked metal gate. Hikers wishing access to Canoncito / Bart’s Trail can park to the side of the road outside of the gate. (Please be sure not to block any private driveways or traffic when you park.) The private land owners will allow hikers to walk up the road to the trailhead. Please be respectful of their private property.
Hike Description
After parking outside the locked metal gate (wp CNCPK), begin the hike up the dirt road to the trailhead proper (wp BRTCNC), which is about one mile’s walk from the car. Bart’s Trail and Canoncito begin from the same spot, marked by Forest Service signs. For this loop hike, I usually take Canoncito Trail first, then hike south on a short a stretch of the Crest Trail, then go down on Bart’s Trail.
In times of good rainfall, there is often water cascading down a series of 1-foot-high waterfalls along the first portion of Canoncito Trail. This is a travertine formation, a light-colored porous calcite, CaCO3, deposited from solution in ground or surface waters that contain lime. Shortly past the falls, you will pass the junction of Canoncito Trail with Faulty Trail, marked by a sign (wp CNCFLT).
Coninuing the hike up Canoncito is pretty, with a steady but moderate slope. You will reach the intersection with the Crest Trail about 3 miles into the hike (wp CNCSCR). From there, I head south on the South Crest Trail to the junction with Bart’s Trail, marked by a sign, after about a half mile (wp BRTSCR).
Descend on Bart’s Trail, making your way back to your car.
| Waypoint | Latitude | Longitude | Description |
| BRTCNC | N 35° 8.417′ | W 106° 23.171′ | Bart’s and Canoncito trailheads |
| BRTSCR | N 35° 8.624′ | W 106° 24.837′ | Bart’s Trail – South Crest Trail junction |
| CNCFLT | N 35° 8.808′ | W 106° 23.343′ | Canoncito – Faulty Trail junction |
| CNCPK | N 35° 8.112′ | W 106° 22.635′ | Canoncito parking (road blocked) |
| CNCSCR | N 35° 9.213′ | W 106° 24.881′ | Canoncito – South Crest Trail junction |
North 10K Trail and Osha Loop Trail
Driving Instructions
To reach the trailhead for this hike, head east from Albuquerque on I-40, north on NM 14 for 6 miles, and up the Crest Highway (NM 536) about 11 miles to the North 10K Trail parking lot on the right (north) side of the road (wp N10KPK).
Hike Description
Begin this hike by heading north on 10 K Trai. After about 1.5 mile you will reach the intersection with Osha Loop Trail (wp 10KOLP), marked by a signpost. Take the right branch to follow Osha Loop Trail, which makes about 3 mile loop (including portions of the Crest Trail and 10K Trail).
After about a mile on Osha Loop Trail, you will reach another trail intersection marked by two gray signposts (wp OLPOSP). The turn-off to the left (west) continues on Osha Loop Trail, and to the right is Osha Spring Trail, which goes down to Penasco Blanco Trail. For this hike, take the left branch to stay on Osha Loop Trail westward, and up toward the crest ridge. After about a half mile on this section of Osha Loop Trail, you will reach a clearing at the edge of a canyon with a nice view of the large gray rock forming the wall of Penasco Blanco in the distance to the north.
Continuing on Osha Loop Trail you will cross Ellis Trail (wp ELIOLP) and then the junction with Survey Trail (wp SRVOLP). Just a few minutes later, you will reach the intersection with the Crest Trail, marked by a signpost (wp NCROLP). From this junction follow the Crest Trail north for about a half mile to the beautiful Del Agua Overlook (wp 10KNCR ).
To finish your hike, take 10K Trail east from the overlook. Follow 10K Trail past its junction with Ellis Trail (wp ELI10K), and a short while later you’ll be back at the junction with Osha Loop Trail (wp 10KOLP), completing your circuit around the loop. Follow 10K Trail to the south for 1.5 miles back to the parking area (wp N10KPK).
| Waypoint | Latitude | Longitude | Description |
| 10KOLP | N 35° 13.932′ | W 106° 26.631′ | North 10K – Osha Loop Trail junction |
| ELI10K | N 35° 14.057′ | W 106° 26.852′ | Ellis – North 10 K Trail junction |
| ELIOLP | N 35° 14.692′ | W 106° 26.990′ | Ellis – Osha Loop Trail junction |
| 10KNCR | N 35° 14.257′ | W 106° 26.973′ | North 10K – North Crest Trail junction |
| N10KPK | N 35° 12.595′ | W 106° 26.161′ | North 10K parking lot |
| NCROLP | N 35° 14.472′ | W 106° 27.032′ | North Crest Trail – Osha Loop Trail junction |
| OLPOSP | N 35° 14.569′ | W 106° 26.193′ | Osha Loop – Osha Spring Trail junction |
| SRVOLP | N 35° 14.537′ | W 106° 27.013′ | Survey – Osha Loop Trail junction |
Crest Spur Trail, South Crest Trail, and Kiwanis Cabin
Driving Instructions
Take I-40 east from Albuquerque, go north on NM 14 for 6 miles, take the Crest Highway (NM 536) 13.4 miles to the top of the mountain, and park at the main parking lot (wp CRSTPK).
Hike Description
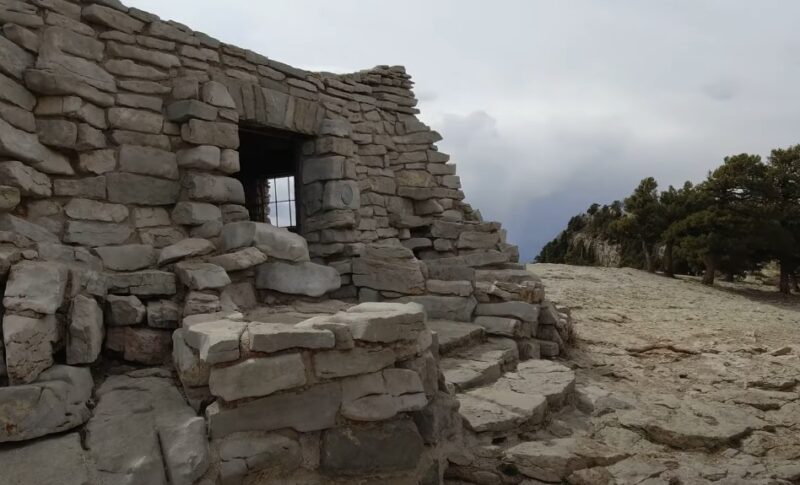
This popular hike is a easy loop between the Crest House (at the top of the Crest Highway) and the upper Tram Terminal, with a side trip to historic Kiwanis Cabin. Although this route is often crowded from visitors to the Crest, it offers many beautful view of Albuquerque and the Rio Grande Valley to the west.
Start hiking on the Crest Spur Trail, which begins at the south end of the Crest House (wp CSPTH). The Crest Spur Trail is one route for hiking over to the Upper Tram Terminal. It drops down below the crest ridge by a few hundred feet, and meets the upper portion of La Luz Trail. Please beware of a few drop-offs along the side of the Crest Spur Trail and be careful of your footing.
After about a half mile you will reach a fork in the trail (wp CSPLLZ). At this spot La Luz Trail heads-off to the right and down the mountain. Take the left branch to continue your hike to the upper Tram Terminal, about one mile to the south (wp CRSTRM). You may want to enjoy a snack or meal at the High Finance restaurant adjacent to the Tram Terminal, or spent some time learning more about the Sandias at the Four Seasons visitors center. There is also a self-guided Nature Trail of interest just north of the Tram area.
From the Tram Terminal area hike north on the Crest Trail (Trail 130) toward the Crest parking lot. The old trails along the ridge to Kiwanis Cabin and through Kiwanis Meadow are blocked-off with a fence. There are a number of signs explaining that the meadow has been closed to allow it to recover from decades of over use by the public. Continue walking north along the Crest Trail for a half mile or so, to the turn-off to a route over to Kiwanis Cabin (wp CRSKIW). It takes just five or ten minutes to walk over to Kiwanis Cabin (wp KIWCAB), where you may spent some time enjoying at the view and reading about the history of this spot. It is a beautiful area, and well worth the trip.
To finish this short hike, head north to the Crest Trail and follow it north to your car.
| Waypoint | Latitude | Longitude | Description |
| CRSKIW | N 35° 12.433′ | W 106° 26.661′ | Crest Trail – Kiwanis Cabin Trail junction |
| CRSTPK | N 35° 12.679′ | W 106° 26.958′ | Crest parking lot |
| CRSTRM | N 35° 11.822′ | W 106° 26.089′ | Crest Trail (130) – Tram trailhead |
| CSPLLZ | N 35° 12.276′ | W 106° 26.849′ | Crest Spur – La Luz Trail junction |
| CSPTH | N 35° 12.570′ | W 106° 26.921′ | Crest Spur (north) trailhead |
| KIWCAB | N 35° 12.206′ | W 106° 26.594′ | Kiwanis Cabin |
Chimney Canyon Trail and La Luz Trail
Driving Instructions
Go east on I-40 from Albuquerque, north on NM 14 for 6 miles, take the Crest Highway (NM 536) 13.4 miles to the top of the mountain, and park at the main parking lot (wp CRSTPK).
Hike Description
Begin by hiking north on the Crest Trail from the parking lot. After a half mile, you will reach a small sign (wp CHMTH) that says Del Agua Overlook 1.5 Mi. This is the best access to the Chimney Canyon Trail. Just to the west of the sign is a trail heading west. Take this little trail, which immediately forks; follow the rough trail to the south (left).
After a few hundred yards, you will reach a fork in this trail (wp CHMWP1). One branch goes east, and upward to the radio towers; you want to take the right fork to continue down the mountain. However, you will immediately encounter another branch in the trail after only 20 feet. At this point, the left branch heads south over to the Crest Spur trail. The Chimney Canyon route is the right, downhill branch. The trail is pretty easy to follow the whole way after getting past these few branch points. The trail begins to take a more southerly tact from here..
About a half mile from the Del Agua sign, you will arrive at a distinct aspen grove (wp CHMWP2). It is on a small saddle, easily located on a topo map. The grass is this area is ofen tall, and it can be hard to find the trail through this grove. The proper route is to keep toward the left. The trail begins going down hill and to the left, toward the “inside corner” of the canyon walls to the east.
The downhill slope starts to get steep; soon it becomes unbelievably steep. The trail descends a steep rock slide (wp CHMWP3), which takes a lot of patience and scrambling to get down. It must drop 400 feet or more, going nearly straight down. At least I’d have to say that the route is very well worn and easy to see (if not easy to scramble down) the whole way. You will eventually reach the base of the Chimney (wp CHMNEY), a large rock formation from which the canyon gets its name.
The remainder of the way down Chimney Trail is relatively easy. After a while, the trail takes a significant jog to the right (north) staying well above the streambed. The trail stays along the northern slope of the canyon as the ground turns to sandy soil. The last few hunderd yards before reaching La Luz Trail are pretty indistinct, so make your way down to La Luz Trail the best way possible (wp CHMLLZ). This spot is a few hundred yards downhill from the point that the La Luz Trail crosses the streambed running down from Chimney Canyon.
To finish this tough loop hike, walk back up La Luz Trail to the Crest. This is a strenuous 2,400 foot vertical climb, which is especially tiring after the challenging scramble down Chimney Canyon. About 2.5 miles up La Luz you reach the bottom of the rock slides (wp LLZRK2). It is a 1.4 mile trudge to the top of the rock slide (wp LLZRK1). A short distance farther you will arrive at the turn-off to the Tram, at the intersection with the Crest Spur Trail (wp CSPLLZ). Take the left fork (toward the north) continuing up the Crest Spur Trail to the parking area (wp CRSTPK), ending a rugged and memorable hiking day.
| Waypoint | Latitude | Longitude | Description |
| CHMLLZ | N 35° 12.763′ | W 106° 28.045′ | Chimney Canyon Trail – La Luz Trail junction |
| CHMNEY | N 35° 12.795′ | W 106° 27.270′ | Chimney rock formation |
| CHMTH | N 35° 13.089′ | W 106° 27.085′ | Chimney Canyon trailhead |
| CHMWP1 | N 35° 13.026′ | W 106° 27.170′ | Chimney Canyon Trail waypoint below radio towers |
| CHMWP2 | N 35° 12.942′ | W 106° 27.240′ | Chimney Canyon Trail aspen grove |
| CHMWP3 | N 35° 12.877′ | W 106° 27.193′ | Chimney Canyon Trail along the rock slide |
| CRSTPK | N 35° 12.679′ | W 106° 26.958′ | Crest parking lot |
| CSPLLZ | N 35° 12.276′ | W 106° 26.849′ | Crest Spur – La Luz Trail junction |
| LLZRK1 | N 35° 12.308′ | W 106° 26.884′ | La Luz top of rock slides |
| LLZRK2 | N 35° 12.437′ | W 106° 27.313′ | La Luz bottom of rock slides |
Osha Spring Trail
View this post on Instagram
Driving Instructions
To find the trailhead, drive north from Albuquerque on I-25, take exit 242 east, and continue all the way through Placitas. Highway 165 curves around to the south, and becomes a dirt road. Drive a couple of minutes on the dirt portion, and the trailhead is immediately south of the second one-lane bridge. There is a small brown sign on the right (west) side of the road, but it is barely visible from the car. Park across the road from the trailhead, which is on the west side of the road (wp OSPTH).
Hike Description
From the trailhead you begin hiking in a northerly direction. After perhaps five minutes there is a sharp jog in the trail (wp OSPSW) back to the left (south).
Osha Spring Trail is a rough and primative trail. It follows an abandoned rock-bed jeep road for much of the way. In some places it can be a little unclear whether you are following the correct route. At times there are alternate, parallel branches of the “road”. Try to keep on the main branch and you will usually came out OK.
There are nice views of the mountains and plains to the north and east, and of the eastern slopes of the Sandias above you as you hike along. In general, the hike uphill is quite a workout. The trail is exposed to the sun, and makes for a very hot hike in the summer months.
After about three quarters of a mile (wp OSPWP1), the trail takes a sharp turn to the west opening up a nice view of a canyon to the north, and all the way up to the Penasco Blanco wall of gray rock above you (and to the east). About two miles into the hike, you will reach a very nice area for a break (wp OSPWP2). As you came up to this spot, the trail heads up a slope and is partially blocked by 20 to 30 small shrubs. Just over the rise beyond this point, the trail turns left and goes down into a nice little area. This recess is shaded by tall pine trees and by the ridge that you have just walked up. There are large, gray “shelf rocks” to sit on to enjoy a snack and a water break.
The scenery along the trail becomes much nicer beyond this spot. Soon you pass through a stretch where the trail becomes a dirt road, instead of the rocky track you have been on. In places along here, the trail is indistinct, so pay close attention to the route.
Further on, there are a couple of long stretches in which small trees overgrow the trail. You may have to move the limbs apart and keep ducking them for several minutes. Fortunately, the trail is usually well marked with cairns along the way.
Near the top, the trail passes along the northern rim of a canyon (wp OSPWP3), and then jogs a little ways back to the north. The trail switches to soft dirt through some tall trees and lots of grass just before (five minutes) you reach the end (wp OSPWP4). The path travels through a small vale for a couple of minutes before reaching the intersection with Penasco Blanco Trail (wp OSPPBL). I usually stop right here, but Osha Spring Trail technically continues to the left for just another couple of minutes, to the point that it meets Osha Loop Trail (wp OLPOSP).
After a well-deserved rest finish the hike downhill for 4 miles to return to your car (wp OSPTH).
| Waypoint | Latitude | Longitude | Description |
| OLPOSP | N 35° 14.569′ | W 106° 26.193′ | Osha Loop – Osha Spring Trail junction |
| OSPPBL | N 35° 14.664′ | W 106° 26.129′ | Osha Loop Trail – Penasco Blanco Trail junction |
| OSPSW | N 35° 16.737′ | W 106° 24.672′ | Osha Spring Trail switchback |
| OSPTH | N 35° 16.516′ | W 106° 24.555′ | Osha Spring Trail trailhead |
| OSPWP1 | N 35° 16.295′ | W 106° 24.824′ | Osha Spring Trail waypoint 1 |
| OSPWP2 | N 35° 15.759′ | W 106° 25.190′ | Osha Spring Trail waypoint 2 |
| OSPWP3 | N 35° 14.691′ | W 106° 25.794′ | Osha Spring Trail waypoint 3 |
| OSPWP4 | N 35° 14.677′ | W 106° 26.059′ | Osha Spring Trail waypoint 4 |
Tramway Trail
Driving Instructions
To find the trailhead, drive to the (lower) Tram terminal via Tramway Blvd. Take the first left in the Tram parking lot. The trailhead is at the top of the first parking area, at the northeast corner (wp TRMPK).
Hike Description
Tramway Trail travels north along the western foothills for 2.7 miles from the Tram terminal to meet La Luz Trail (about 1 mile from the La Luz trailhead). Tramway Trail gets a lot of use by people who park their car at the Tram and then take Tramway Trail to join La Luz Trail and hike to the top of the mountain (then ride the Tram back down!). The trail is a little indistinct in some places, and it is criss-crossed with dozens of unofficial paths that have been worn over the years.
The trail initially gains some elevation to get around the neighboring houses, then begins a downhill stretch toward the west for a while. The trail passes a junction marked by three brown sign poles pointing the way (wp TRMWP1). One of the signs says “0.8 miles to the Tram,” the other two signs points toward La Luz Trail.
A few minutes later you will pass a sign that points west to Spring Creek (wp ROZTRM). From here you can see the ruins of one of the old ranger cabins (Jaral Cabin) just down the trail (wp JARCAB). The Rozamiento Trail (also know as Jaral Cabin Trail or Spring Creek Trail) goes down the slope from here.
About a mile and a half into the hike, you pass a signpost pointing the way to La Cueva Picnic Ground (wp TRMLPG). The picnic facilities in this area were built in the 1930’s by the Civilian Conservation Corps, and make for a nice side trip 0.3 mile down La Cueva Trail to check-out the old stone work.
From here you can return to your car by retracing your route along Tramway Trail or continue hiking up La Luz Trail.
| Waypoint | Latitude | Longitude | Description |
| JARCAB | N 35° 12.025′ | W 106° 28.995′ | Jaral Cabin |
| LLZTRM | N 35° 12.817′ | W 106° 28.535′ | La Luz – Tramway Trail junction |
| ROZTRM | N 35° 11.998′ | W 106° 28.946′ | Rozamiento – Tramway Trail junction |
| TRMLPG | N 35° 12.333′ | W 106° 29.016′ | Tramway Trail turn-off to La Cueva Picnic Ground |
| TRMPK | N 35° 11.519′ | W 106° 28.753′ | Tramway Trail parking lot (south trailhead) |
| TRMWP1 | N 35° 11.945′ | W 106° 29.027′ | Tramway Trail three signposts |
Boundary Loop Trail
Driving Instructions
To find the trail, go north on Tramway Boulevard. A mile north of the Tram, take the right turn onto FR 333. Park at the small lot past the second cattle guard, just a short distance east of the turn-off from Tramway. The trailhead is on the north side of FR 333 (wp BNDTH).
Hike Description
This hike goes through Jaral Canyon, a seldom visited area of the western foothills. The two trails that form the Boundary Loop Trail are officially designated as East Jaral Canyon Trail (Trail #204) and West Jaral Canyon Trail (Trail #3A). The area is outside the Wilderness boundary, so mountain biking also is allowed on these trails.
Boundary Loop Trail begins by following a rocky slope north from FR 333, up to a ridge. Just over the ridge, the trail takes a turn to the right (east). The trail maintains level elevation as it begins to head eastward. After less than a half mile, the trail takes a sharp dip downward (wp BNDWP1). From this point, Boundary Loop continues to the north.
Continue hiking north, up the broad arroyo on a fairly well-worn trail. The trail soon makes a significant veer to the east (wp BNDWP3). This path leads you to a blind opening into a rocky arroyo (wp BNDWP2), with a noticable rock formation at the mouth of the entrance that you will have to scramble up. Once you have found these landmarks, you are in the proper entrance to the east side of the Boundary Loop Trail (Tr. 204). From here, continue to hike up the streambed until you reach the northern end of the trail, about a mile away. Along the way, you will occassionally spot a worn trail off to the side of the streambed. It is usually worth taking the trail to the side, because the footing is usually a little firmer. At the north end of Jaral Canyon, hike up a slope to reach the edge (wp BNDWP4) of the very deep (several hundred feet) Juan Tabo Canyon to the north.
The trail continues on up the ridge toward the west from this point. Just a few minutes later you will reach the top of the ridge (wp BNDWP5). The trail then starts down another ridge toward the south. Going down, you will arraive at a saddle point where three trails branched (wp BNDWP6).
At the saddle point (wp BNDWP6), and looking south, the trail before you splits in two. The left branch heads south and up to the ridge that separates the two sides of Jaral Canyon. I usually take the right fork and continue south, dropping to the arroyo bottom. This branch of the trail is West Jaral Canyon Trail (Trail #3A). The trail turns into a jeep road (wp BNDWP7) along the way and stays above and to the west of the streambed. The trail eventually will lead you down into the arroyo bottom (wp BNDWP3). Continuing south, just a minute or two later you will reach the point mentioned in the fourth paragraph of the Hike Description (wp BNDWP1).
From here either retrace your route at the first portion of the hike, heading west up the slope. Alternatively, you can continue hiking south up the steep slope, over the ridge and down to FR 333 (about 1/3 of a mile east of your car).
| Waypoint | Latitude | Longitude | Description |
| BNDTH | N 35° 12.159′ | W 106° 30.233′ | Boundary Loop trailhead / parking |
| BNDWP1 | N 35° 12.364′ | W 106° 30.128′ | Boundary Loop waypoint 1 |
| BNDWP2 | N 35° 12.487′ | W 106° 30.011′ | Boundary Loop waypoint 2 |
| BNDWP3 | N 35° 12.468′ | W 106° 30.084′ | Boundary Loop waypoint 3 |
| BNDWP4 | N 35° 13.054′ | W 106° 29.839′ | Boundary Loop waypoint 4 |
| BNDWP5 | N 35° 12.974′ | W 106° 29.977′ | Boundary Loop waypoint 5 |
| BNDWP6 | N 35° 12.893′ | W 106° 30.015′ | Boundary Loop waypoint 6 |
| BNDWP7 | N 35° 12.738′ | W 106° 30.013′ | Boundary Loop waypoint 7 |
Agua Sarca Trail, North Crest Trail, Del Orno Trail
Driving Instructions
To find the Agua Sarca Trail, take I-25 north from Albuquerque, and take exit 242 east, toward Placitas. Take the turn-off for FR 231 just before (about 50 yards) the 5-mile marker on this highway. At the turn-off, there is a green street sign that says Tunnel Spring (the name of the dirt road), and a group of mail boxes. Drive about 2 miles up the dirt road. There is a sign for the Agua Sarca trailhead on the right (west) side of the road, and a parking area to the left (AGSTH).
Hike Description
Agua Sarca Trail generally follows an old jeep trail for three quarters of a mile, or so. It heads up a steep slope to a saddle point (wp AGSWP1), then drops into Agua Sarca Canyon itself. There is an important “Y” in the trail 0.2 miles later (wp AGSWP2); the left branch is the correct route. Going left, you will find a very well established trail that is easy to follow. From there, you will began a steep section of trail cutting through tree cover.
You will arrive at a distinct “T” in the trail (wp AGSWP3) about a mile and a half into the hike. The left branch continues to parallel the stream. However, the path to the right is the correct way.
Following the right branch of the trail eventually leads to a huge pile of rocks. At one time this may have been a cooking grill, or a shelter; it is certainly a noticeable landmark (wp AGSWP4). There is also a large wooden shelter adjacent to the rock pile.
Agua Sarca Trail continues from this spot up the steep terrain toward the south. At some places (especially some rocky places near the top) the trail is hard to see. However, there are a number of cairns to mark the way. Agua Sarca Trail continues all the way up to join the Crest Trail (wp AGSNCR). The trails meet at the North Del Agua Overlook on the Crest Trail, at a stone bench. If you were hiking north on the Crest Trail, this is the overlook spot where the trail makes a sharp switchback to the east. If you were to hike straight north (and didn’t make the turn in the switchback) you would meet the Agua Sarca Trail that you have just hiked up.
Rather than returning down the mountain via Agua Sarca Trail, I usually make this hike into a loop by going down on the North Crest Trail and the steep Del Orno Trail. Hiking down the Crest Trail, you pass through a streambed (occassionally with flowing water) that runs through upper Agua Sarca Canyon (wp NCRSTR). A half mile later, you will pass the north trailhead of Penasco Blanco Trail (wp NCRPBL).
After another 2.3 miles you will reach the top of Del Orno Trail (wp DORNCR). This trail junction is 5 minutes past a stone bench that you will pass along the way. Just as you make a sharp inside turn in the Crest Trail, crossing a little stream bed, continue about another 50 yards north to find the turn-off to Del Orno Trail, which is marked by a cairn (wp DORNCR). Del Orno Trail goes down to the left, toward the streambed.
Del Orno Trail comes out at the North Crest Trail about 10 feet east a wooden sign that says “Sandia Mountain Wilderness” (wp DORTH). From there walk from the Crest Trail parking area (wp NCRTH) to your car at the Agua Sarca lot (wp AGSTH), about 0.2 mile.
| Waypoint | Latitude | Longitude | Description |
| AGSNCR | N 35° 15.771′ | W 106° 27.025′ | Agua Sarca – North Crest Trail junction |
| AGSTH | N 35° 17.489′ | W 106° 26.464′ | Agua Sarca trailhead |
| AGSWP1 | N 35° 17.091′ | W 106° 26.630′ | Agua Sarca waypoint 1 |
| AGSWP2 | N 35° 16.926′ | W 106° 26.677′ | Agua Sarca waypoint 2 |
| AGSWP3 | N 35° 16.562′ | W 106° 26.486′ | Agua Sarca waypoint 3 |
| AGSWP4 | N 35° 16.478′ | W 106° 26.728′ | Agua Sarca waypoint 4 |
| DORNCR | N 35° 16.890′ | W 106° 26.097′ | Del Orno Trail – North Crest Trail upper junction |
| DORTH | N 35° 17.451′ | W 106° 26.323′ | Del Orno Trail lower trailhead |
| DORWP1 | N 35° 17.068′ | W 106° 26.154′ | Del Orno waypoint 1 |
| NCRPBL | N 35° 15.759′ | W 106° 26.460′ | North Crest Trail – Penasco Blanco Trail junction |
| NCRSTR | N 35° 15.636′ | W 106° 26.919′ | North Crest Trail crosses stream |
| NCRTH | N 35° 17.487′ | W 106° 26.372′ | North Crest trailhead (Tunnel Spring) |
Fletcher Trail
Driving Instructions
Take Tramway Boulevard north; turn right on FR 333, one mile north of the turn-off to the Tram. After two miles, the paved road makes a hard right turn through two stone pillars, going up to La Luz Trail (that way is marked as FR 333). However, you want to continue straight ahead, on the dirt road marked as FR 333D. The dirt road makes a right turn around a corner, and leads back to the Piedra Lisa Trail parking lot (wp PLSTHS).
Hike Description
Fletcher Trail is accessed from Piedra Lisa Trail. Fletcher Trail is not part of the maintained trail system in the Sandia Mountains. As such, it is easier to get lost in a remote part of the mountain. Be sure that you take a map and compass (or GPS) on this hike, in case you should become lost.
Hike north from the Piedra Lisa parking lot on the dirt road for about one third of a mile until you reach the turn-off to Piedra Lisa Trail, marked by a sign (wp PLSWP4). Hike up a rise for a short ways, then the trail drops into a small canyon that contains the intersections with Fletcher Trail and Movie Trail, which both come down from the right (east) at the bottom of this dip (wp FLETH). Two arroyos come down the mountain from the east at this point and cross Piedra Lisa Trail. The left (northern) arroyo leads to “Upper Juan Tabo Canyon” via Fletcher Trail. The right (southern) streambed leads up Waterfall Canyon. Movie Trail is on the ridge between these two canyons.
Begin Fletcher Trail by hiking up the (north) arroyo. You will pass a large, wooden sign just a minute or so up the trail that contains the seasonal closure warning mentioned above (wp FLEWP1). About a half mile up Fletcher Trail, the trail lifts out of the sandy arroyo, onto the right bank (wp FLEWP3). This turn-off is easy to miss, so keep a close watch (or use your GPS to find this spot). From this point, Fletcher Trail heads into the woods and it becomes a very pleasant walk. The trail basically parallels the arroyo for a while. It is usually covered with fallen leaves year round. After about a third of a mile, the trail swings north, crossing the arroyo (wp FLEWP2) and then heads east up to a ridge.
The hike up the ridge is steep, with loose dirt, so the footing is not very good. After the climb up the ridge, the trail swings south from this point (wp FLEWP4) and generally remains level for a while. The trail is somewhat hard to spot in places along here, but still not too bad. The trail winds around the ridge and begins going up into a canyon toward the east. There are nice views of the Prow (rock formation) across the canyon to the south. Eventually you will come to the base of an obvious large rock formation, which is UNM Spire (wp FLEWP5). This spot is a fine place to end your hike for the day. Going farther involves scrambling up some steep rocks.
If you continue on, the trail travels south and east around the corner of the slope, below a large rock formation. The scrambling on the trail is pretty hard along here and the trail also becomes less and less distinct. Eventually you will reach a big pile (10 or 15 feet high) of loose rocks at the base of a large rock formation (wp FLEWP6). At this point you will be back farther into the canyon than the eastern end of the Prow, which is to the south. The large wall of rocks above are very slick and shiny, with lots of black discoloration. I usually turn around at this point, and retrace my steps on Fletcher Trail back to my car.
| Waypoint | Latitude | Longitude | Description |
| FLETH | N 35° 13.851′ | W 106° 28.774′ | Fletcher trailhead |
| FLEWP1 | N 35° 13.877′ | W 106° 28.714′ | Fletcher Trail waypoint 1 |
| FLEWP2 | N 35° 14.191′ | W 106° 28.479′ | Fletcher Trail waypoint 2 |
| FLEWP3 | N 35° 14.083′ | W 106° 28.636′ | Fletcher Trail waypoint 3 |
| FLEWP4 | N 35° 14.215′ | W 106° 28.274′ | Fletcher Trail waypoint 4 |
| FLEWP5 | N 35° 14.093′ | W 106° 28.090′ | Fletcher Trail waypoint 5 (UNM Spire) |
| FLEWP6 | N 35° 14.087′ | W 106° 28.017′ | Fletcher Trail waypoint 6 |
| PLSTHS | N 35° 13.378′ | W 106° 29.005′ | Piedra Lisa (south) trailhead |
| PLSWP4 | N 35° 13.698′ | W 106° 28.938′ | Piedra Lisa waypoint 4 |
Domingo Baca Trail and TWA Canyon
Driving Instructions
To find Domingo Baca Trail, take Tramway Boulevard north past Academy, and turn east to the Elena Gallegos Open Space parking area. You must pay a parking fee at the guard shack on the way to the parking area. Park at the northeast corner of the lot (wp 140TH).
Warning: This is one of the most remote and rugged areas in the Sandia Mountains. The hike to TWA Canyon is not along an officially maintained trail. Do not attempt this hike by yourself, in case an emergency should arise. You should also be well prepared physically, and have provisions to take care of yourself in the event of a mishap in the wilderness. You should wear a long-sleeved shirt and long pants, due to numerous sticker bushes and low-hanging trees along the upper portion of the route. I also recommend that you take a GPS, if you have one available, and use the waypoints that I have listed to help you find your way through this area.
Hike Description
This hike goes deep into Domingo Baca Canyon, a rugged part of the Sandia Mountains. It continues to the site of the wreckage of a TWA flight that crashed into the mountain on February 19, 1955, killing 16 people. The hike covers quite a range of terrain over its length. The lower part is bare and rocky, going up a sandy arroyo. The upper portion, which usually has flowing water, is lush and overgrown with greenery.
Follow several of the trails in the Elena Gallegos Open Space to get over to the entrance to the Sandia Mountain Wilderness. There are signs along the way pointing the way to Domingo Baca Trail. You can take the Nature Trail, and Trails 342, 341, and 230 to make your way to the entrance to the Wilderness, about a half mile into the hike.
I recommend taking the first entrance into the wilderness (wp DBCTH), rather than following Trail 230 farther. This avoids the many mountain bikers on the Open Space Trails. About a half mile inside the wilderness area, the trail takes a noticeable turn from its northeast direction (wp DBCWP1) and begins to go straight east.
You will come upon the ruins of an abandoned shelter (just its rock foundation is left) about a half mile later (wp DBCWP2). The ruins are just north of the trail about 30 feet, at a spot where the main trail jogs south, across a streambed.
The turn-off to TWA Canyon is 0.2 miles (wp DBCWP3), about a five minute walk, east of the ruins just described. You must be hiking along the streambed, within the deep tree cover, to find this turn-off. Coming up to this spot there is actually a nicer, well-worn trail to the north of the stream. You need to make your way down to the stream itself. As you walk east along the stream, look closely to your right for a crude path taking you out of the streambed and up the 20-foot-high embankment toward the southeast. There is often a cairn marking this spot. If you miss this turn-off and continue up the streambed, you will soon run into a deadend canyon blocked by a 30-40 foot high wall of rocks. If you have a GPS, I recommend that you use the waypoint that I list (wp DBCWP3) to find the spot.
The good news is that once you scramble up the embankment, you will find a relatively good and well-worn trail for the remaining 1.6 miles up to the crash site. However, the trail is quite steep, gaining about 1,400 feet in elevation over that distance.
From the turn-off, the trail crosses some open, sandy terrain for a short distance. It then joins another streambed, which it follows for the rest of the hike. After another 0.2 miles, you will pass a nice area that looks like it has been used as an established camp site (wp DBCWP4). I have heard that the Boy Scouts used to come up to this area for overnight camping trips.
The hike up the canyon is pretty rugged and steep, through dense tree cover. Along the way, you may hear the Sandia Tram passing overhead, but the trees are so thick that you might not be able to see it. When you are nearly below the Tram wires, the trail takes a veer to the left (north), heading directly toward the plane wreckage.
The trail become more rugged and less distinct as it makes its way up the slot canyon. There is a significant rock obstacle, about 10-15 feet high, that you must scramble up along the way.
After perhaps another ten minute walk through the dense foliage, you will come upon the first of the wreckage (wp TWA). There is a large, about 4 foot by 4 foot, portion of the fuselage with a large red number 416 on the side, and two rubber tires. As you continue up the canyon there are hundreds of pieces of the plane strewn around, including identifiable parts of the engine, propeller, and landing gear.
With some perseverance and route finding it is possible to continue all the way up the canyon above the wreckage to join La Luz Trail, just north of the upper Tram Terminal. However, I don’t recommend this steep and difficult hike.
| Waypoint | Latitude | Longitude | Description |
| 140TH | N 35° 9.795′ | W 106° 28.200′ | Parking lot and Trailhead for Trail 140 |
| DBCTH | N 35° 10.262′ | W 106° 28.011′ | Trailhead to Domingo Baca Trail |
| DBCWP1 | N 35° 10.520′ | W 106° 28.117′ | Domingo Baca waypoint 1 |
| DBCWP2 | N 35° 10.805′ | W 106° 27.718′ | Domingo Baca waypoint 2 |
| DBCWP3 | N 35° 10.886′ | W 106° 27.594′ | Domingo Baca waypoint 3 |
| DBCWP4 | N 35° 10.882′ | W 106° 27.442′ | Domingo Baca waypoint 4 |
| TWA | N 35° 11.696′ | W 106° 26.552′ | TWA Crash Site |
Mano Route
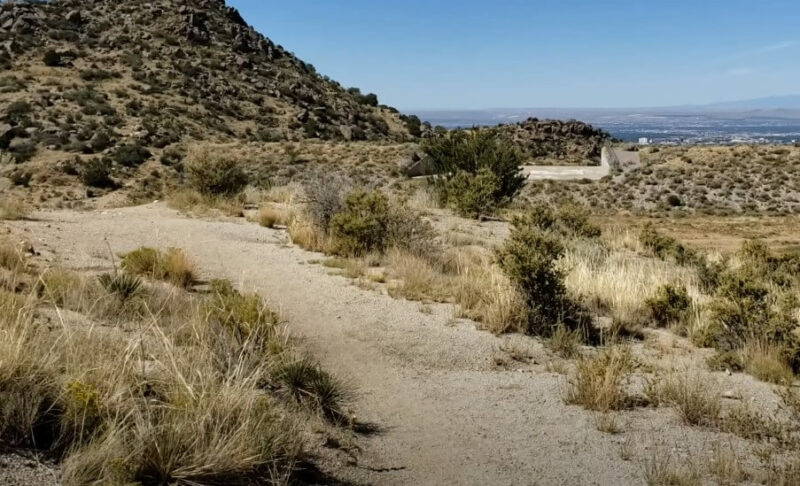
Driving Instructions
To find the trailhead for Mano Route, the driving instructions are the same as for Embudo Trail. Go east on Indian School Road from Tramway Boulevard. Follow Indian School until it ends at the large parking area (wp INSCPK). You might consider leaving a second car at the Open Space parking lot at the eastern end of Copper Boulevard. Doing so would shorten the end of this hike by about 2 miles.
Hike Description
Mano Route is a lesser used route in the foothills at the southern portion of the west side of the Sandia Mountains. It is a good Fall or Winter hike. The hike begins on Embudo Trail, and then works its way south to the start of Mano Route.
Start hiking on Embudo Trail toward the east, then cut south around the east end of the large, empty “holding pond.” Signs point toward Trail 365, which is part of the system of Foothills Trails. However, it is more efficient to stay on the old rocky path that runs below the power lines (wp 365PWR) as you head south, rather to than follow Trail 365, which goes a little westward. The northern trailhead for Mano Route is at the third set of power line poles (three poles side-by-side), at the top of the second ridge that you will reach (wp MNONTH). From this ridge looking south, you can see the U-Mound a couple of miles to the south. There is a wide trail heading due east from the power-line poles, which is Mano Route. There is a small sign marking the National Forest Wilderness boundary a few yards up the trail.
The trail is clearly visible and easy to follow up the ridge for a few minutes. Mano Route then takes a jog south (wp MNOWP1) around the corner of a ridge into a small canyon. Follow the trail back into this canyon (walking east) to the point that the trail starts to swing around in the canyon and turns to the south. Just before the trail swings south, look closely for a branch in the trail going up the hill and to the left (wp MNOWP2). It is very easy to miss this turn to the left. Once you find the correct turn-off, the trail continues northeast up to the top of the ridge line. When you reach the top of the ridge (wp MNOWP3), the trail is easy to follow again for quite a distance.
After a pretty steep climb up the ridge, you will reach the top of a wide, flat, open area. There are panoramic views in all directions, including Albuquerque laid-out to the east. The flat stretch is welcome after the hike up the ridge. The trail continues east, then swings around to the south going behind a small hill to the west. Behind that hill, piled high with large boulders, is a broad saddle point (wp MNOWP4), after which the trail begins a slight downhill grade.
Continue to follow the trail and you will reach the edge of a canyon to the south (wp MNOWP5). Across this canyon, directly to the south, is another broad plateau, upon which lies the southern half of Mano Route. Continue to go straight south, dropping down into the canyon a hundred feet or so at the low point (wp MNOWP6), then hike up the slope to the other side. There is a very indistinct trail going south, which you should follow as best you can, coming up on the opposite side of the canyon (wp MNOWP7).
Once you reach the far side of the canyon, continue walking south on the plateau until you reach a well-worn trail running east-west (wp MNOWP8). This is the southern leg of Mano Route.
Continue to follow Mano Route to the east on this plateau, up to a prominent rise just a quarter of a mile or so up the hill. There is a single large tree at the top of the saddle point (wp MNOSDL). It is a distinctive landmark that you can see from the streets of Albuquerque. There are vistas in all directions from this pass, including a view all the way down to Tijeras Canyon to the southeast. There are faint “user trails” heading to the north and to the south from the pass, going up to the prominent neighboring peaks on either side.
The path down the southern leg of Mano Route is easy to follow. It travels west across the broad plateau below the pass, then generally keeps to the ridgeline coming down the foothills. Mano Route ends at a set of quadruple power line poles on top of a ridge (wp MNOSTH).
If you have left a car at the parking lot off of Copper, you can head south from this point on criss-crossing trails that head generally south and east of the U-Mound. Once you’ve passed U-Mound, head around to the west, to the parking area.
If you car is back at the Indian School lot, head north from Mano Route, back toward the Embudo trailhead. Coming down from the ridge, you will pass a large sign (wp 365W5) by the trail pointing one direction for Copper Trailhead and the other direction for Embudo Trailhead. Continue hiking north on this trail.
The hike along this area is very pretty. The trail generally parallels the power lines that run north-south, but it keeps to the west and a few hundred feet below them most of the way. After about a mile and a half, Trail 365 takes a swing to the east, toward the power lines. This is just north of the set of power line poles at the northern Mano Route trailhead (wp MNONTH). Continuing this direction would lead you around the east end of the large holding pond that you passed earlier in the hike.
However, at this point (wp 365AW1) there is another sign pointing to Trail 365A that continues going north. I normally take Trail 365A, which soon wraps around the west side of some foothills and drops you down to the Indian School parking area (wp INSCPK). Taking Trail 365A cuts-off about half the final distance of the hike.
| Waypoint | Latitude | Longitude | Description |
| 365AW1 | N 35° 5.652′ | W 106° 28.493′ | Trail 365A waypoint 1 |
| 365PWR | N 35° 5.849′ | W 106° 28.339′ | Trail 365 crosses power lines |
| 365W5 | N 35° 5.137′ | W 106° 28.536′ | Trail 365 waypoint 5 |
| INSCPK | N 35° 5.943′ | W 106° 28.800′ | Parking lot at end of Indian School |
| MNONTH | N 35° 5.525′ | W 106° 28.344′ | Mano northern trailhead |
| MNOSDL | N 35° 4.803′ | W 106° 27.756′ | Mano Trail saddlepoint |
| MNOSTH | N 35° 5.019′ | W 106° 28.593′ | Mano southern trailhead |
| MNOWP1 | N 35° 5.486′ | W 106° 28.220′ | Mano Trail waypoint 1 |
| MNOWP2 | N 35° 5.431′ | W 106° 28.157′ | Mano Trail waypoint 2 |
| MNOWP3 | N 35° 5.345′ | W 106° 28.020′ | Mano Trail waypoint 3 |
| MNOWP4 | N 35° 5.223′ | W 106° 27.995′ | Mano Trail waypoint 4 |
| MNOWP5 | N 35° 5.145′ | W 106° 27.961′ | Mano Trail waypoint 5 |
| MNOWP6 | N 35° 5.016′ | W 106° 27.988′ | Mano Trail waypoint 6 |
| MNOWP7 | N 35° 4.930′ | W 106° 27.978′ | Mano Trail waypoint 7 |
| MNOWP8 | N 35° 4.890′ | W 106° 27.984′ | Mano Trail waypoint 8 |